
UPDATE: This article and its associated code have been updated for Angular 8.x. The same article is also available for React.
In this tutorial we’re going to build a simple single-page application with Angular (v8 and above). This is intended for developers unfamiliar with the new framework or having some experience with AngularJS. First of all, I got Visual Studio Code installed on my machine and it’s running on Linux. I chose VS Code because we’ll be working with TypeScript mostly and it has great support for it, but you can code in your favourite IDE as well. Originally, the code in this article was based on the excellent Angular 2 Seed project by Minko Gechev That project is now deprecated in favor of Angular CLI and the code here has been migrated to use the new official build tool for Angular. You’ll also need to have Git, Node.js and npm installed.

Step 0 (frontend)
- Get Visual Studio Code
- Get Git
- Get Node.js with npm
- Install ‘Angular CLI’ with
npm install -g @angular/cli - Open the project in the VS Code editor
1 | npm install -g @angular/cli |
Next - the backend. Here, I could write a simple backend in Node.js and Express but I’m lazy so I chose not to. Instead, I’m going to use Para for my backend and I’m not going to write any code on the server. If you are new to Para, it’s a general-purpose backend framework/server written in Java. It will save me a lot of time and effort because it has a nice JSON API for our app to connect to. To run the server you’re going to need a Java runtime.
Step 0 (backend)
1 | # run Para |
Now, check if Para is running - open your browser and go to http://localhost:8080/v1. You should see a response like
this:
1 | { |
We haven’t got access keys to the server yet, so let’s go ahead and do that, open:
1 | http://localhost:8080/v1/_setup |
Save the credentials to a file, we’ll need them later to access the backend API.
Step 1 - API access
Let’s create an app for storing recipes - a recipe manager. Our goal will be to build just the basic CRUD functionality,
without adding extra features like authentication and login pages. By default the backend is secured and only signed
requests are allowed, but for the purpose of this tutorial we’re going to add a new permission to allow all requests to
just one specific resource - /v1/recipes.
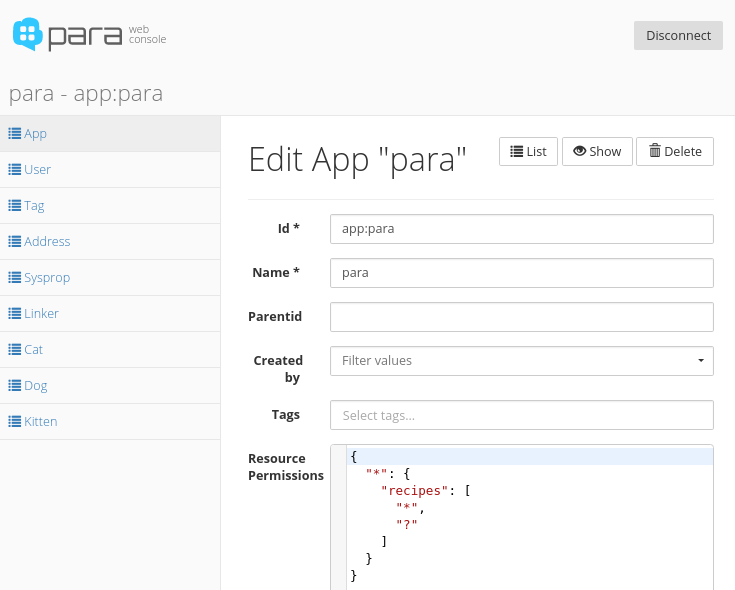
Go to console.paraio.org and enter the credentials that you saved in the beginning. Also
click the cog icon to edit the API endpoint and set it to http://localhost:8080. Click ‘Connect’.
Next, go to ‘App’ on the left and edit the root app called para. You’ll see a section for resource permissions and
there you will write a simple permission definition in JSON:
1 | { |
This defines a single permission that allows * - everyone to access /v1/recipes using a list of allowed methods,
in this case * - all HTTP methods and ? - anonymous access is allowed. Thus, we’re essentially making this resource
publicly available. Click ‘Save Changes’.
Step 2 - CRUD recipes
Let’s create a new frontend component called “home” with the command ng generate component home.
Now let’s edit the ‘home’ component under src/app/home. In particular, we want to edit the HTML code in home.component.html:
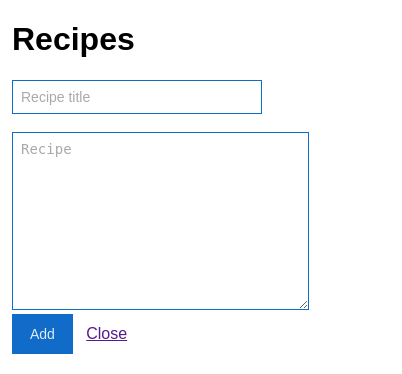
1 | <h1>My Recipes <button (click)="newRecipeForm()">Add</button></h1> |
I’ve added the “Add” button which shows the form where we can write a recipe (controlled by newRecipeForm()), a textarea,
and a close button. Notice how the text value of the “Add” button changes to “Save” when we’re in edit mode. Coming
from AngularJS, you’ll notice the weird [(ngModel)] syntax - it’s a two-way binding (single brackets is one-way).
Similarly, *ngIf is just shorthand for [ngIf].
Let’s create a new “core” module and 2 new components inside it - the “toolbar” and “navbar”.
1 | ng generate module core |
Also, I chose to set a new title in the header section in src/app/core/toolbar/toolbar.component.html:
1 | <h1>Recipe Manager <code><small>v{{version}}</small></code></h1> |
Let’s create a new service to talk to our Para backend and fetch recipes. Let’s call it RecipesService.
1 | ng generate service recipe |
The service file should be located in src/app/recipe.service.ts. We’ll modify the file recipe.service.ts to allow for
another parameter text in the add() method. Let’s also add the code for making the POST request to the backend:
1 | import { environment as Config } from 'src/environments/environment'; |
The Config object is actually imported from src/environments/environment.ts where we have a JS object containing all
the configuration properties for our project. That file replaced with environment.prod.ts when we compile the project
for production use.
In the code for home.component.ts we’ll add a few fields to manage the recipes. The start of that component should look
like this:
1 | ({ |
Now we’re going to focus on that addRecipe() method so let’s implement it:
1 | addRecipe(recipe: any) { |
Let’s also add the method for listing recipes listRecipes() and call it upon initialization:
1 | ngOnInit() { |
You’ll notice that in home.component.ts, we subscribe to the Observable returned by
recipeService.add() and get back the list of recipes when they arrive.
1 | this.recipeService.add(this.newName, this.newRecipe).subscribe((data: any) => { |
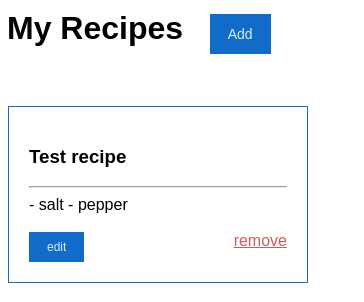
In home.component.html we loop over the recipesList of all available recipes, and also a box which appears
when there are no recipes to show:
1 | <ul> |
Let’s add the styling for .recipe-box and .empty-box later in home.component.css:
1 | .recipe-box { |
In src/styles.css I’ve also added a few more tweaks to the CSS:
1 | input, textarea { |

So, we should now we able to add recipes and after we click “Add” the form should be cleared and closed.
For this let’s add a couple of methods in home.component.ts - one to initialize the form and one to reset the
state of the form:
1 | newRecipeForm() { |
The variable recipeId will keep the value of the id when a recipe is being edited. When “Save” is clicked this
id is passed to the service and the backend so it won’t create a new object, just update an existing one.
We’re issuing these requests and we don’t care about the results because we can update the UI
instantly, without having to wait for the request to finish.
1 | editRecipe(recipe: any) { |
Let’s also add similar methods in our RecipeService for updating and deleting recipes. The methods editRecipe() and
removeRecipe() are relatively straightforward - when editing, we switch to edit mode and we show the form, when
removing we just filter the array recipesList and we discard the deleted recipe if it matches the id.
1 | edit(id: string, name: string, text: string) { |
In home.component.ts we’ll modify the code for addRecipe() to also edit a recipe when recipe.id is set.
1 | addRecipe(recipe: any) { |
We can now add, edit and remove recipes but they aren’t very pretty and the formatting of the text is lost. In the next step we’ll make it possible to write the recipe text in Markdown and then render it in HTML.
Step 3 - Markdown support
First of all, let’s install showdown - a nice JavaScript parser for Markdown:
1 | npm install showdown --save |
Then we import it in home.component.ts:
1 | import { Converter } from 'showdown'; |
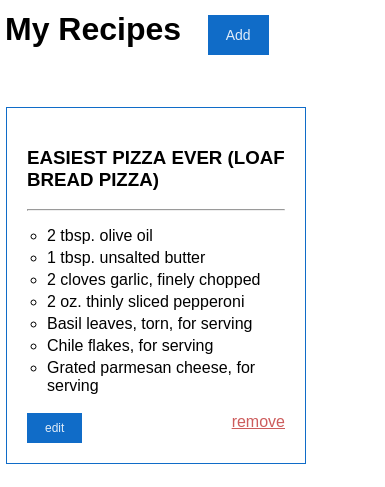
Finally we’ll implement a simple method called md2html() which will be used in our template.
1 | md2html(text: string): string { |
In our HTML template we call it like this:
1 | <div [innerHTML]="md2html(recipe.text)"></div> |
Now we render the text to HTML on the client and this allows us to write beautiful recipes like this:
Step 4 - Full-text search
The final feature left is the recipe search box. We’ll use the built-in full-text search in Para. In recipe.service.ts:
1 | search(q: string) { |
And in home.component.ts:
1 | search(): boolean { |
Finally, we add the search box in the template below the heading:
1 | <h1>My Recipes <button (click)="newRecipeForm()">Add</button></h1> |
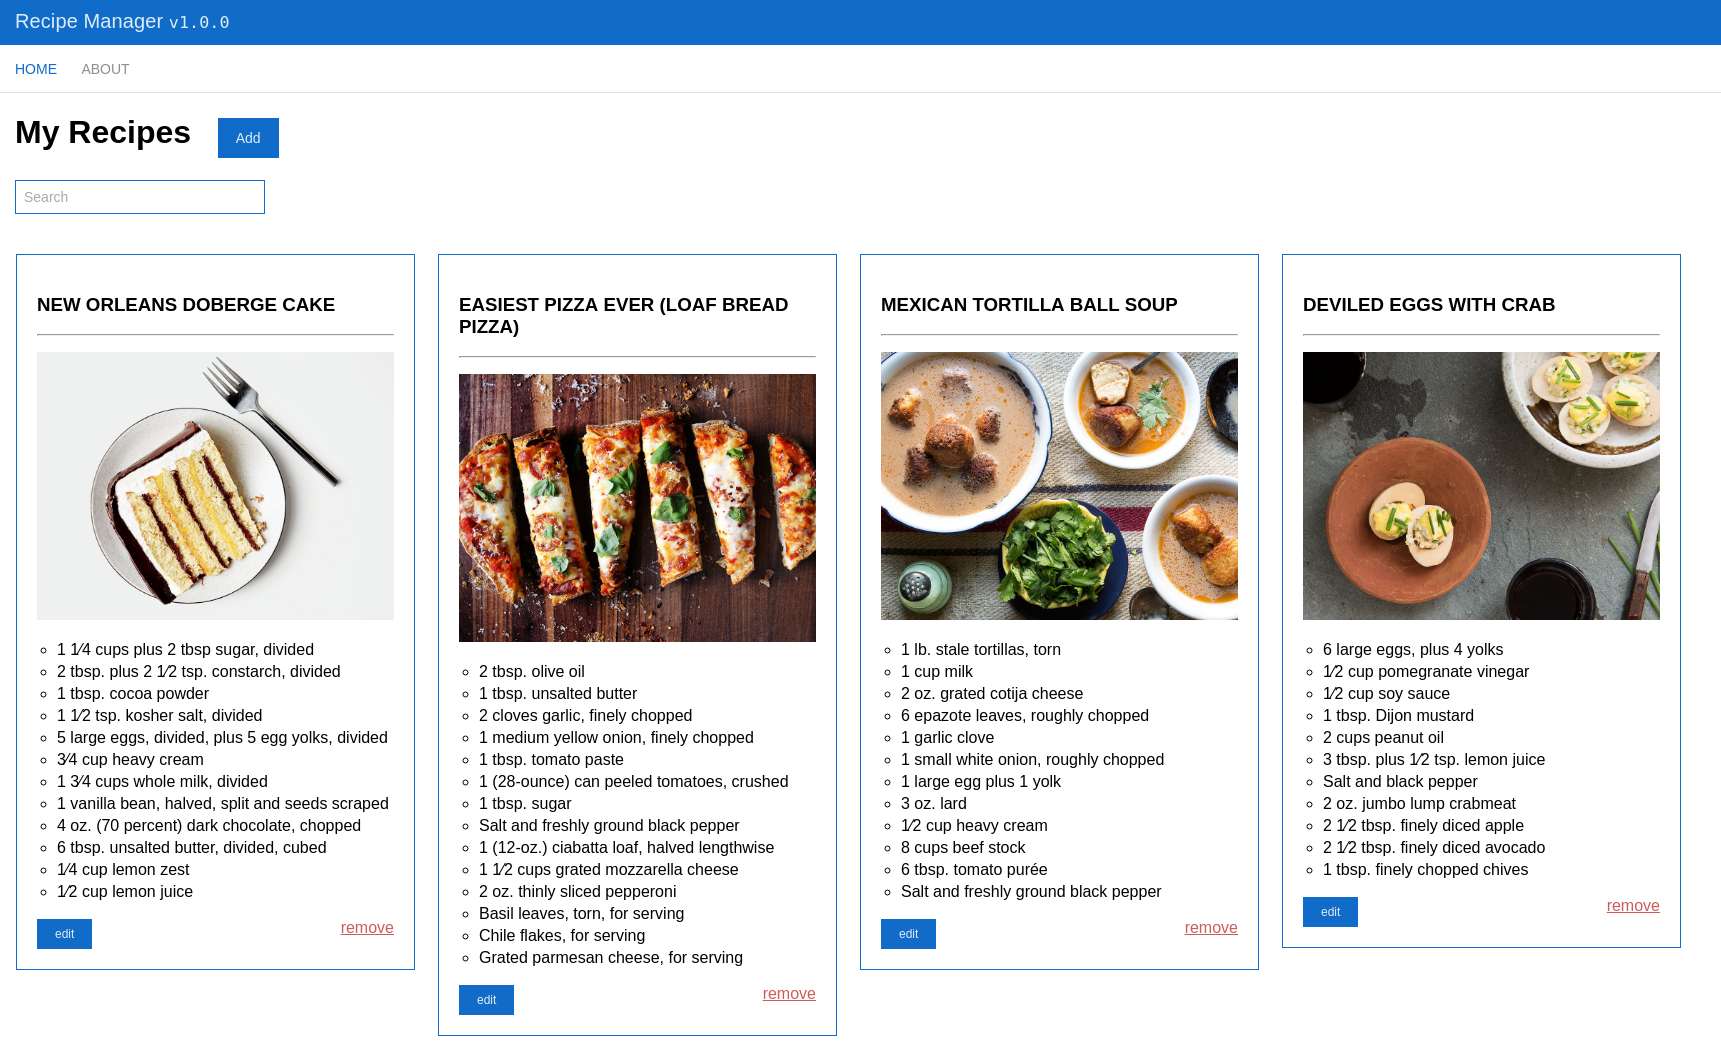
And we’re done! Here’s final result of our Recipe Manager (check out the live demo):
Final touches
You can see the result in your browser by running ng serve. Optionally, you can make this web application “progressive”
(PWA) by adding the package @angular/pwa with ng add @angular/pwa. This will create a manifest.json and make the
page available offline. Our code now passes the Lighthouse audit with flying colors!

All that is left is to build the project for production and deploy it:
1 | ng build --prod --base-href /angular2-para/ |
Summary
Learning Angular takes some time as it introduces a lot of architectural changes and new syntax.
Writing in TypeScript feels fresh and more like writing in a modern statically typed language like C# or Java,
rather than a dynamic language like JS. The import syntax was a bit hard for me to get used to, especially
with all the different files I had to navigate through. In general, the experience of writing Angular apps with the help
of the new Angular CLI tool is great - the scaffolding just works, the build process is fast and painless,
the TypeScript syntax is clean, the app is well structured and the error messages are clear and understandable.
Things we did:
- generated a new project from scratch with Angular CLI
- wrote a few fancy AJAX calls to our backend API
- wired a bunch of simple TypeScript code between a component and a service
- wrote some good old HTML and CSS
- imported an external library with npm an typings
Things we didn’t do:
- didn’t write any backend code for CRUD operations on recipes
- didn’t define a schema for the “recipe” type on the server side
The complete code for this tutorial is on GitHub at albogdano/angular2-para. I’ve deployed the same code to GitHub pages as a live demo which is powered by our cloud-based Para service.
Have questions or suggestions? Chat with us on Gitter!